Materials Needed:
Instructions:
 |
1. Carefully cut 12 pieces of elastic ribbon (or string) long enough to fit around your head plus about five extra inches. Adding the extra inches is an important step to make it easy for you to tie the elastic ribbon onto your nose mask. It also allows you to easily adjust the fit of the mask to your head. |
|
|
  |
2. Tear or cut off the top of the egg carton and put it into the recycling bin. Next,
carefully cut out all of the individual egg sections from the egg carton. |
|
 |
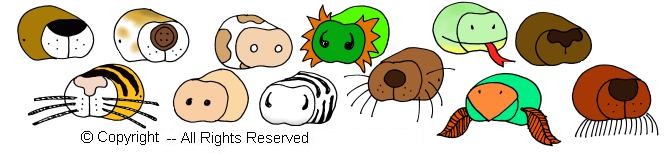
3. Using the suggestions above or your own ideas, paint and decorate your 12 "noses." (Be sure to allow drying time before you begin decorating if you
use paint.) You can glue a cotton ball or a button to add a nose to make a snout. Attach pipe cleaners,
construction paper strips or yarn to add whiskers or hair. And markers are perfect for adding
stripes, spots, and some freckles to your mask. Feathers,
shoestrings, wire, glitter and stickers are also things you can use to decorate your nose
mask.
Just use your imagination and have fun!
After you are done decorating, set your nose masks aside in a safe place to
allow the glued-on items time to dry and set. |
|
|
 |
4.
When your nose masks have completely dried, take them one at a time and carefully poke a
small hole about 1/4 inch from the backside edge directly across from each other on
both sides of the mask. A freshly-sharpened pencil works best for this, but you can carefully use the points of scissors as well. |
|
|
|
 |
5. From the decorated side, thread one end of the elastic or string into each hole. Now, tie a large knot on each end to secure the elastic in place. (You may have to adjust the elastic a little to get the fit just right.)
Finally, when your nose mask fits the way you want, tape down the elastic on the inside of the mask so
it will be securely held in place. Now enjoy your mask! |
|
Artwork
and instructions by Mark A.
Hicks, illustrator |
|